Learn to Crochet Left-Handed :: Slip Knot 2024.

.
I am starting a new series of blog posts here at the Roxycraft blog. I am teaching you lefties out there how to crochet!
If you are like me, it was a little more difficult to find resources online on how to crochet left-handed. If you’re a right-handed knitter, I suggest trying to learn to crochet leftie. You are using your right hand to work the yarn, just like in your knitting, so I knit right-handed and crochet left-handed because it made more sense to my brain. So if you’re a rightie, give this a try!
First lesson is the Slip Knot. This is the stitch that anchors your yarn to your hook. For amigurumi a lot of folks use something called the "magic ring". I don’t because this is what I am comfortable with. Also, in these lessons, I am trying to teach you the fundamentals for all crochet projects and the slip knot is a must!
I took step by step photos, and unlike my book "Tiny Yarn Animals" these are my own unmanicured, chubby hands. *pardon the moment of self-deprication*
الجيريا
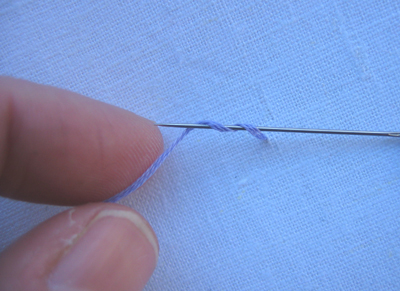
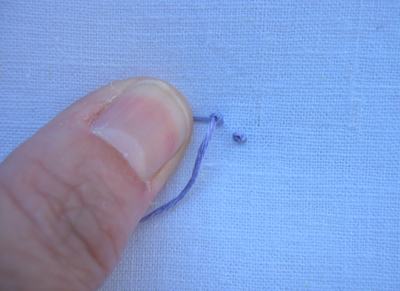
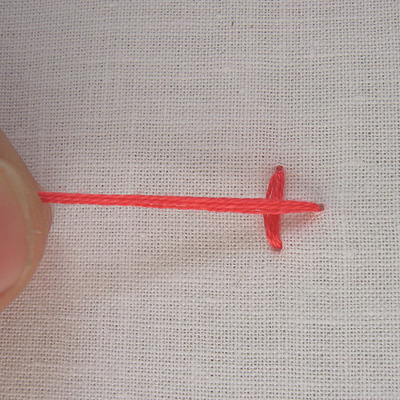
Step 1: Wrap the yarn around the first and middle fingers of your right hand like the picture illustrates. The cut end of the yarn should be near the tips of your fingers.

الجيريا
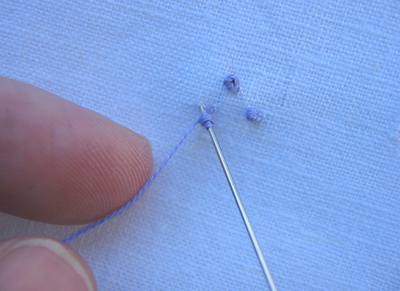
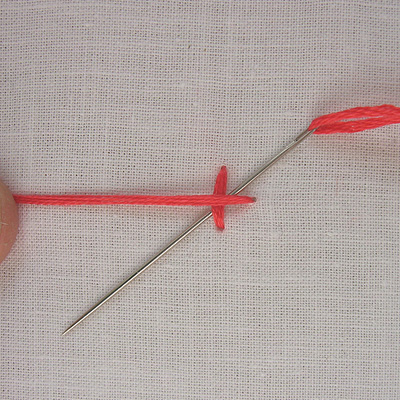
Step 2: Take your cut end and slide it under your first loop.
الجيريا
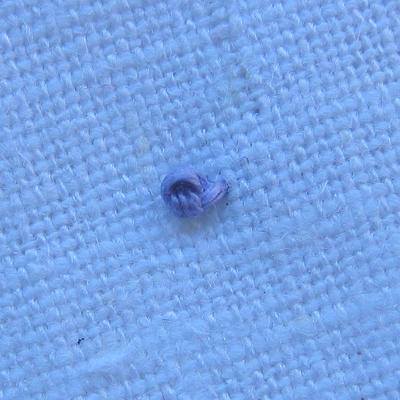
Step 3: With your index finger on you right hand, slip it through the back loops. Go in front of the loop closest to your fingertips and grab the second loop that closest to you palm
الجيريا
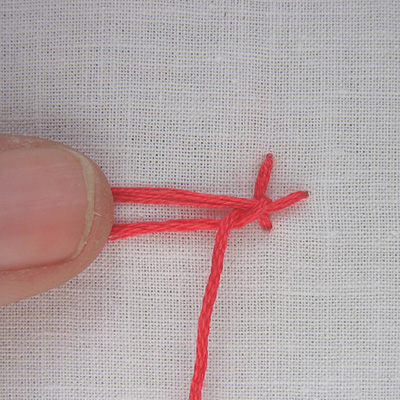
Step 4: Pull the loop out while securing the rest in your left hand
الجيريا

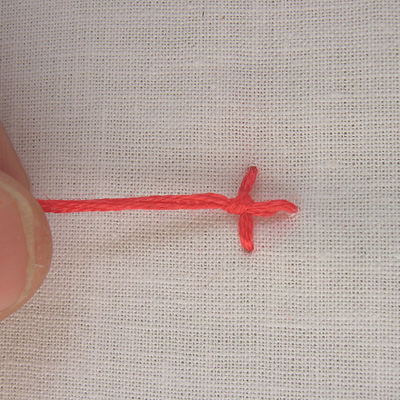
Step 5: Put our hook through your loop and tighten it by pulling the end of your yarn that still attached to your skein, not your cut end.
That’s it! Simple right?

مشكورة غاليتي

french knot 2024.

French Knot or, as some of you have started referring to them, the dreaded French knot. Really, they aren’t that bad.

French knots are essential to embroidery because there’s nothing else quite small enough or that works so well for fine details—facial features like eyes and curls, for example.

الجيريا

They’re most often used singly for the centers of flowers, or massed together to form the flowers themselves.

الجيريا

الجيريا

They’re also very handy for making single dots—like for polka dots on a dress or for depicting fleece on a lamb (for a baby pillowcase, perhaps).

To start, bring your thread to the front. Hold the thread firmly between your left index finger and thumb and away from the fabric.

الجيريا

With the needle pointed away from the fabric, wrap the thread over and around the needle with your left hand. Wrapping twice will give you a smaller knot, three times will give you a larger one.

الجيريا

Holding the thread taut with in your left hand, turn the needle downward and start to take it to the back a few threads away. (If you try to use the same hole, the knot is very likely to pull back through and disappear). With the tip of the needle inside the hole, slide the knot down the needle onto the fabric pulling the thread taut with your left hand at the same time. This is where the tension comes in. If you pull the knot too tightly, the eye of the needle won’t fit through the knot as the thread goes to the back. If it’s too loose you’ll get a sloppy knot that won’t lay flat.

الجيريا

Slowly push the needle to the back of the fabric while holding the knot in place under your thumb. I usually hold the thread down with my thumb because it helps to see the knot. Begin to pull the thread through. Continue to pull until the thread disappears under your thumb and is completely pulled through.

الجيريا

This is going to feel very awkward for a while so you’ll need to practice. The secret is to hold that left thread taut and, whether you use your fingers or thumb will depend on what feels more natural to you. This is one of those stitches that would be much easier to show you in person—kind of like knitting and crochet are better demonstrated than learned by looking at pictures in a book. So, if you’re having trouble and want to ask questions, put them in the comments and I’ll answer them there. I think you need to do this stitch as many times as it takes you to stop thinking about it and just do it. I’m like that with chopsticks. If I think about what I’m doing I can’t use them but if I just relax and stop trying so hard, it starts to come naturally.

Here’s what the finished knot looks like:

الجيريا

And yes, mine is a bit too loose near the fabric. I need some practice myself.

منقوووووووول من مدونة عالم التطريز

الجيريا

مشكورة يا اختي
كل الشكر
الجيريا
الجيريا
fantastic thank you
j’aime bc la broderie française elle a un charme
مشكووووووووورة
تسلمي يا الغالية
شكرااااااااااااا

four-legged knot 2024.

The four-legged knot stitch looks like a simple cross stitch with a knot in the center, but the knot is actually part of the second crossed thread not done afterward and on top. A bit hard to explain but you’ll see what I mean in a minute.

Take a stitch from top to bottom—this will become the first half of the cross. Then bring your needle up to begin the second half of the cross and pull your thread through.

الجيريا

Lay the thread across the center of the stitch and hold it with your thumb.

الجيريا

With the thread looped below, slide your needle diagonally from upper right to lower left and under both threads.

الجيريا

Pull the thread through gently making sure the loop is under the tip of the needle.

الجيريا

Continue to pull it through, guiding the thread with your thumb, until the knot tightens.

الجيريا

Then bring your needle and thread to the back to complete the cross. And it looks like this.

الجيريا

Here’s a side view so you can see the knot a little better.

الجيريا

جميل جدا
chokrannnnnnnnnnnnnn
بارك الله فيك
رااااااااااائع
مشكووووووووووووووورة