To make this dress you will need:
- 1 yard of knit fabric (I like to use a heavier weight interlock knit, as it is typically easier to sew and is better for the colder weather)
- Basic sewing essentials -thread, scissors, sewing machine (ball point needle when sewing knits)
- Old T Shirt that fits great for pattern purposes (not too loose, not too tight)
First of all, you will need to determine which direction your knit fabric stretches. Take your fabric and stretch it from left to right, and again from up to down. Interlock knit generally only stretches in one direction. We will want to BE SURE to cut our pattern pieces out with the stretch going from left to right, or widthwise.
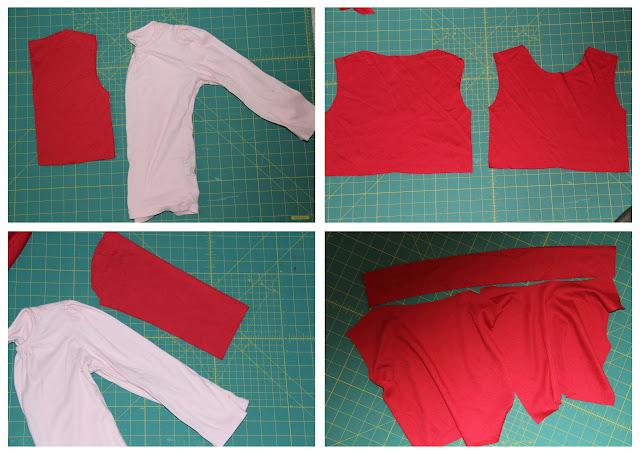
Using an old shirt as your pattern piece, lay it out on the fold on top of your knit fabric which is also on the fold. Cut around the top of your shirt, stopping approximately halfway down your shirt. Cut (2) 0f these, one for the Front Bodice and one for the Back.
Alter the neckline on the Front Bodice pattern piece to match your T Shirt, or slightly lower if preferred.
Cut out your sleeves, using the top of the sleeve as your fold line. I wanted my dress to actually be long sleeved, but made an error when cutting the fabric – so 3/4 sleeve it is! But you can make it any sleeve length you want, including sleeveless!
Using your 2 bodice pieces, measure the entire length of the neckline, and cut out a piece of knit fabric that is that length x 2"W. This will be for your Bias Tape Trim. (Be sure your stretch is lengthwise for this piece.)
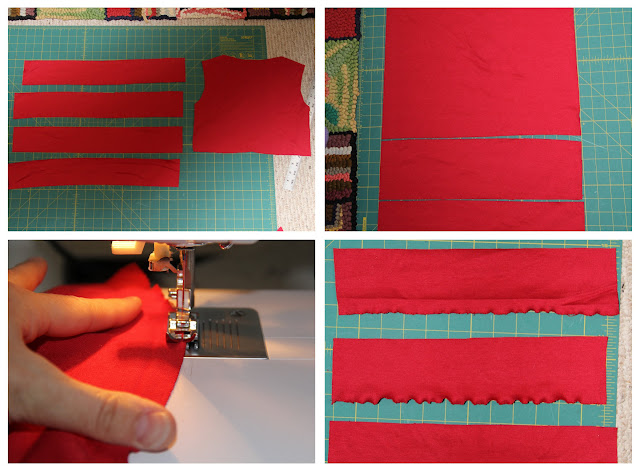
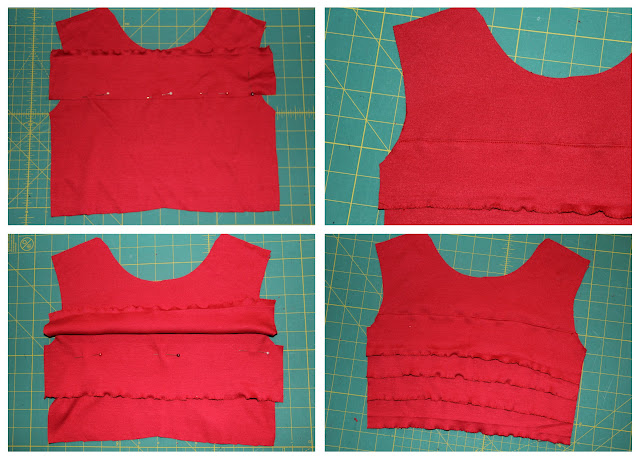
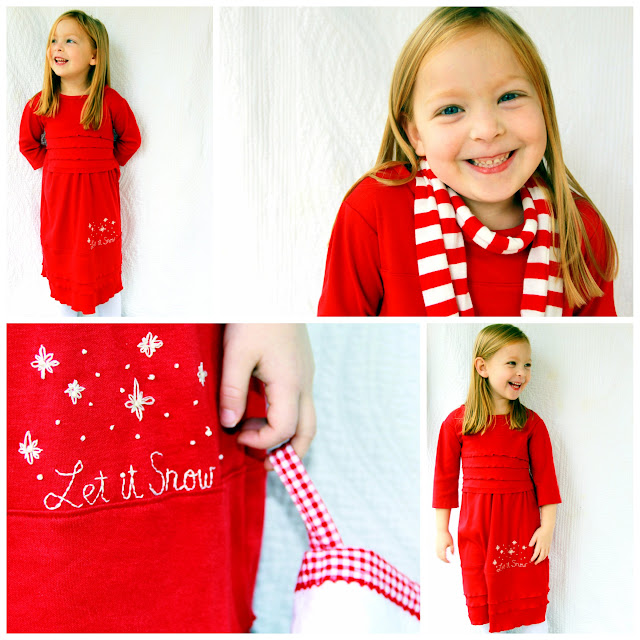
Take your first bodice Ruffle piece and place it right sides together on top of your Front Bodice. The lettuce hem edge will be on top, and the raw bottom edge will be down. Pin the raw bottom edge to the Bodice, I like to start mine around 1" up from the bottom of the armhole. Sew a zig zag stitch over the raw edge securing the ruffle to the shirt.
Press the top ruffle down, covering up your zig zag stitches. Sew a line of edge stitches over the top of the Ruffle.
We are going to now sew each subsequent ruffle underneath your first ruffle, securing the top edge with a zig zag stitch. There is no need to flip the ruffle down as long as you sew the top raw edge underneath the previous Ruffle.
You will have your Front Ruffled bodice when finished. I like the last bottom ruffle to slightly overhang the bodice’s bottom raw edge.
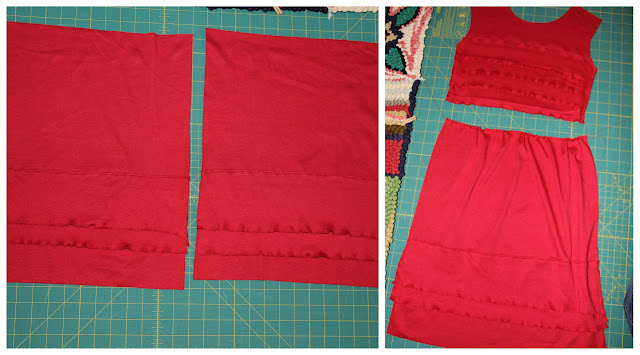
Sew the Ruffles on the bottom of your skirt, being sure to mark them exactly the same on the front and the back skirt pieces. Unlike the bodice, for the skirt the bottom skirt’s hem is showing, as I will simply lettuce edge that later so that the skirt itself becomes the final ‘ruffle’.
Sew a line of gathering stitches along the top edge of each skirt piece. Gather stitches until the top of your skirt is the same width as your bodice.

Pin the bottom of your bodice to the top of your skirt, right sides together, and sew. When doing this for the front of your bodice, be sure your bottom Ruffle is pressed up so that you do not sew it into your skirt.
Press the seam upwards and edge stitch. Repeat for the back bodice and skirt.
You will now have your main Front and Back dress pieces.
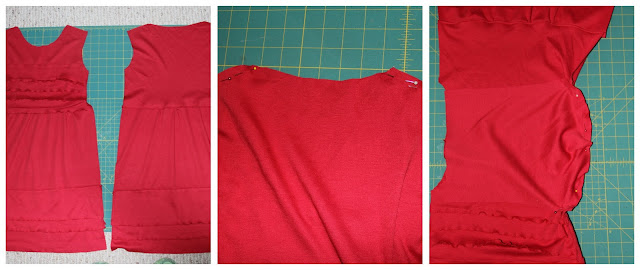
Place right sides together and pin both shoulder seams. Sew.
Taking your sleeve, pin the shoulder arc of the sleeve to your shoulder of your dress body, right sides together. Sew and repeat for other sleeve.
You will now have something that looks like this. I like to hem the bottom of my sleeves at this point. Turning the fabric under towards the wrong side and pressing then sewing, either by using a long straight stitch or zig zag stitch.
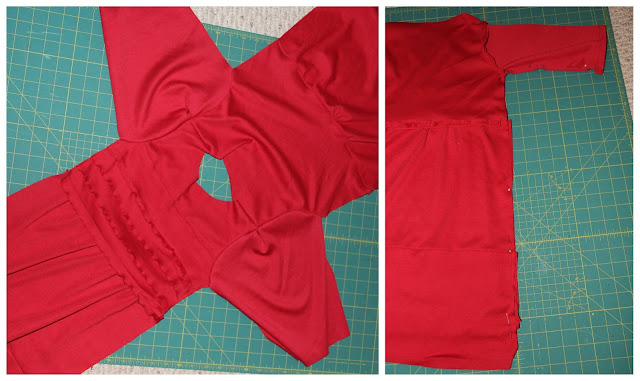
Fold your dress right sides together, matching up your seams. Pin the sleeve and side seams and sew. Repeat for other side.
We are almost finished! I like to hem the bottom of the dress first, as it is easier. Of course you can go with a traditional hem if you prefer…but we did all of those wonderful Lettuce edges on the Ruffles, why not lettuce edge the hem as well? You remember what to do? Set your machine to zig zag stitch, and gently pull on your dress as the hem goes through the machine, with the stitch going over the raw edge.
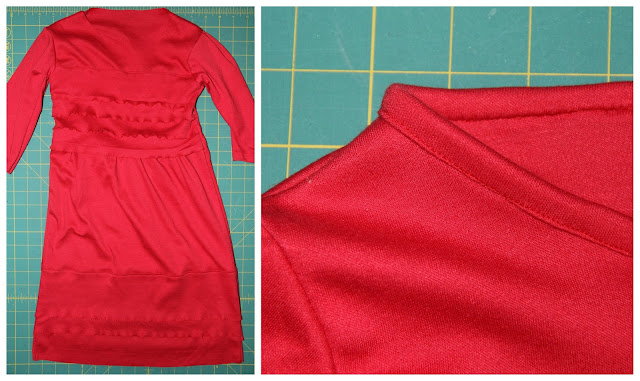
Lastly, all we need to do is finished off the neckline. I did not take pictures of this part, as I happen to always refer to a fabulous tutorial by ikat bag whenever binding with knits, which can be found HERE. (I have tried tons of different binding methods, and this is by far my favorite!)
So remember the strip we cut out for our neckline bias tape? First sew that together at the short edge, creating a circle. The circle should be the exact same size as your neckline. Double check now, just in case you need to alter it a bit! Attach your bias knit trim to your neckline using your preferred method – and voila! You are finished!
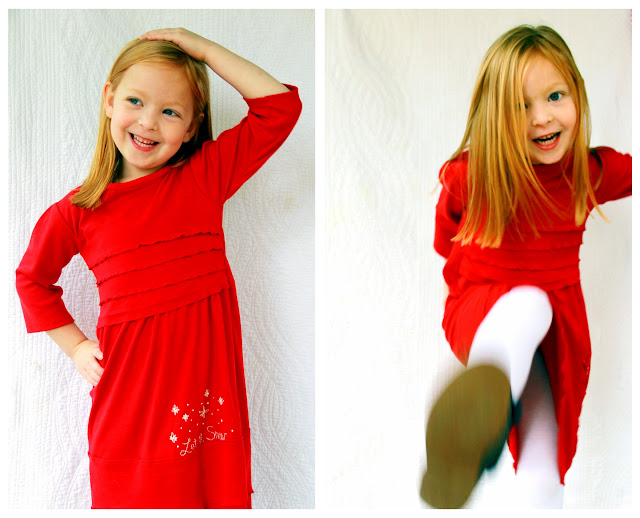
You now have a super cute, super comfy understated ruffle knit dress for your little one – that can be worn all year round!